Tech Info
Star techy Info
I get a lot of questions about my ceramic making and shaking processes and I am more than happy to share the basic techniques of my pseudo-Mishima process. A special hats off to Molly Hatch for first inspiring me to figure out my own adaptation of Mishima. It took me about a year and a half to hammer it all out so don’t get frustrated if learning to handle the calligraphy pen is awkward at first. That will come in time…promise. Practice make perfect ;)
In the mean time you can follow along with these simple step-by-step photos and breakdown of instructions to get on your way to Mishima success! Of course, feel free to adapt any and all techniques that you see fit.
Feel free to share these images and instruction with your friends, colleagues and students,. If you would like to make a little donation, that’s great, but you are not obligated… just be sure you give Forage Studios a little high five in your share mentions! Also, if you have questions feel free to find me through the Contact Section of this website or through my Instagram account @foragestudios
Bonne Chance as they say in these parts!
1. Tracing your image.
Choose an image...any image. It can be on paper or, if you are lazy like I am, you can pull up an image on your computer and work right from the screen! Cover your image or drape your computer screen with a light, clear plastic. I find Mylar or acetate a little too stiff for my liking and plastic painting drop cloth too thin, but clear, plastic garbage bags are juuuuuust right. Take a fine point permanent marker and then trace the image. As you can see you can get pretty detailed, but when you transfer the image you can edit out details here and there if you like. A word about images and copyright. Whenever possible, hunt for "public domain" images on the internet that are truly free of licensing rules and regulations. These can come back to haunt you if you are not careful. One of my fave graphic sites is The Graphics Fairy, but there are so many others to peruse out there.
2. Transferring the Image.
Now that you have your image transferred onto plastic you can now endeavor to get it onto the clay surface. I like to work with a ceramic surface that is a little beyond leather hard; in fact, I like to call it cheddar "cheese hard". It is somewhere between too late to add a handle, but not too late to make a mark on it with your finger nail. Capisce? Now take a dampened, not drenched, sponge and give the area a quick swipe to create a slightly tacky surface for the plastic to stick to. This will make it easier to keep the image in place while tracing. I then take a wooden trimming tool that isn't too sharp at the point and then trace the image. Go light with your touch though! There is no need to dig the tool in as a) you will drag and rip the plastic rendering it useless for future use and b) you only need to transfer a faint line as it will be traced and made more visible with your calligraphy pen. A side note: I use some of my traced images many times over on many different forms so I often add and drop lines to make each piece somewhat different than the next. And of course you can always flip the plastic sheet around to get a reverse/mirror image for something different. Easy peasy, one, two, threesy!
3. Altering the calligraphy nib. ]
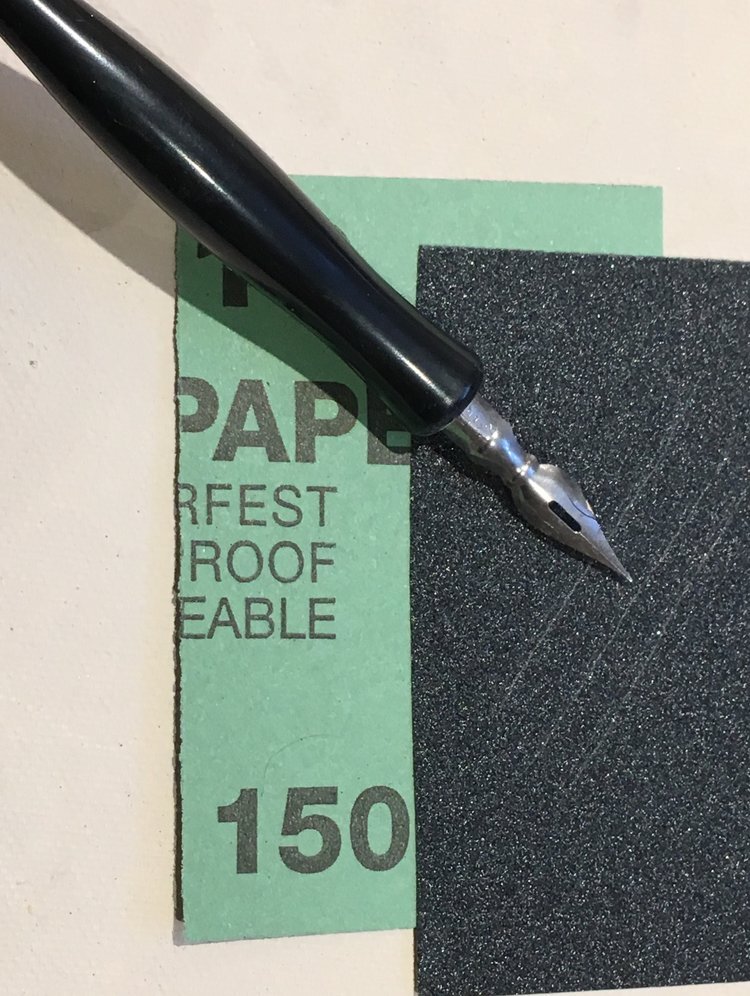
On the left you will see the original and the right is the altered nib!
I want you all to go buy the latest issue of ceramics monthly, but here's an exerpt til I can edit it!!"As the daughter of a sign painter my appreciation for tools and love of the line were honed at
a young age. My choice to major in ceramics resulted in an immersion into tool options and
alterations. To this day, I still cringe at the limited lines and marks that the basic pottery tool
kit’s contents made. The options for mark making were and still are predictable, standardized
and, yawn, boring to see on everyone’s pots. And that pin tool? The lines it made at the hands
of us amateurs incited the visual equivalent of nails on a chalkboard...The horror! The horror!
The big, clunky, wooden trimming tools with their dopey line-making abilities were swiftly
dealt with by sharpening their edges on a sanding belt to, in effect, make new, customized
snappy tools. This resulted in a variety of beveled edges and a world of exciting line qualities to
experiment with. Even the fettling knife could be ground down to create a new, exciting, and
exacting edge (thanks to ceramic artist Katrina Chaytor for that tip).
After a few years of ceramic practice, I wanted to pursue a harder, graphic line to be used in
conjunction with my mishima technique (see 2–4). A plethora of tools can serve this purpose:
X-Acto knives, quills, and yes, I have seen deft use of my nemesis, the pin tool. That said, none
felt right for me and I struggled to find a tool to serve my purpose of achieving line clarity and
sharpness. As with most of the Homer Simpson “doh” moments in my life, the answer was right
under my nose, like a delicious donut. I can’t actually remember the reason I had a calligraphy
pen in my studio, but it was there and the idea to use it for line making poked me in the eye!
After much experimentation, my winning calligraphy nib of choice has come to be the Speedball,
globe-shaped #512 Bowl Pointed Nib (see 1). Still, it wasn’t perfect when used fresh out of the
pack as the long, pointy, split end would wobble and create a faint double line on the leather-
hard clay surface I love to incise in. Flashback to my years of tool altering, I experimented with
gently grinding down the nib’s edges to create more of a gentle slope-to-point ratio. I tried a
variety of abrasive surfaces, but settled on silicon-carbide sandpaper (150-grit), which can be
easily ordered online. Subsequently, you can re-sharpen/reshape the tool edge by giving it a
quick few strokes against the silicon-carbide surface from time to time .
By reducing the nib length and angle by just a little, I cut down on the tip’s wavering tendencies
and gained the control I was missing. After that it was off to the starting line of successful line-
age! Everything after that has been a matter of time spent on technique development,
but I have never lost my “edge” since. Happy tool altering experimentation all and remember
to always look at things from another angle!"
4. Stain on
Adapted Black Stain Recipe: (Adapted from Molly Hatch's fine stain mix)
Mason 6660Black Stain 125 g
OM 4 Ball Clay 1 tablespoon
Frit (*See Note Below) 1 tablespoon
I use a larger yogurt container and add lots of water...think skim milk consistency. Things will settle at the bottom but use your hake brush to stir things up well before applying to your piece.
Use broad, deft strokes to cover any all the incised lines. Again, there is no need to use this stain in a thick manner...think thin. I have found if you make the mix too thick or pasty, it clogs up you nice line work. Later on, when the piece shrinks during its glaze firing, the use of too much stain can cause a sort of spurting effect from the lines as it squeezes and pops out during the firing...yuck.
After brushing on the stain mix, leave the piece to set up....like overnight. Seriously. The reason for this is that if you wipe it out soon after you apply it you will drag most of the damp stain out. So resist the urge to wipe prematurely and go have a martini and watch Netflix or something for the evening.
One more tip: You can stain your piece/lines with other colors! Not just black. Of course lighter stains colors may be harder to read once fired, but there is not reason you can't experiment with other vibrant colors. In a pinch, I will also use thinned down colored underglaze as a stain from time to time. The reason why I don't go this route that often is that using commercial underglaze all the time, can get expensive. The simple stain mix goes much further ;)
(*Frit Note: I am not fussy when it comes to Frit. It helps the stain fuse to the piece, but I have so much leftover from here and there, I use whatever I have; 3110, 3124, 3134.. all have worked for me.)
5. Stain Off
After letting the piece set up overnight, you are ready to "wipe off!" Fill up a bucket of water and find yourself a sponge first. You are going to want to dunk the sponge and wring it out of most of the water so that is more damp than wet. The key to sponging off the stain is to use each side of the sponge only once as repeated use of the stain-soaked sides will just result in smearing that will create a black haze. So this is your mantra... "Dunk, Squeeze, Swipe, Swipe" and then repeat. If you can let them sit for a couple more hours and then give the pieces a last, quick once-over before loading them to bisque, it will greatly help to cut down on the sanding you will have to do post-bisque.
6. Sanding
Blech...a necessary evil. Pull out your dusk mask because it is sanding time!!! I like to use torn up sheets of 100 grit sandpaper first( to get rid of and residual stain haze) and then proceed to 150 grit to smooth things down. After your piece is sanded and soft as a baby's bottom be sure to rinse thoroughly under running water to get all the dust off.
7. Underglazing
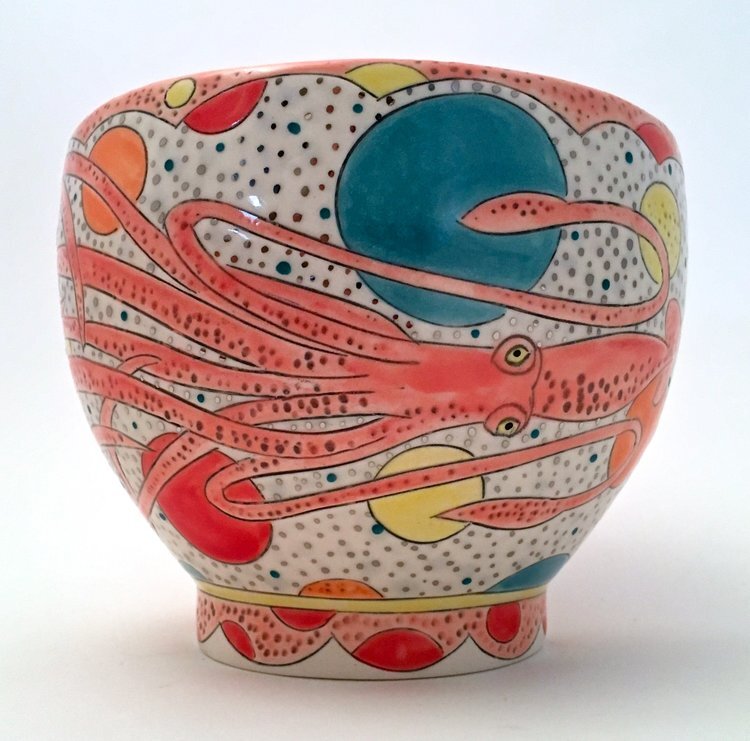
Before applying your colors, be sure to give your pieces another quick rinse to rid the surface of dust and avoid pinholing and other annoying glaze flaws. I love using Mayco Stroke and Coats for my color palette, but I know others who use Amaco Velvets, etc. with great success. Always be sure to take the time to test! I like to vary my brushstroke application from watercolor consistencies to more opaque opaque layers. You can also use the underglazes like watercolor layers on top of one another to give aspects of your pieces more depth (i.e. Sometimes if I am painting a pink squid arm, I will give one side a little swipe with something rosier to give it a little oomph)A note about my brush choice and use. I love the rounded tip brushes that the Windsor and Newton, Cotman Watercolor Series has to offer. They are nice and soft and opposed to hard and scritchy. When using them I load up the brush with underglaze and then, more so than drag it across the bisque surface, I apply the glaze with more of a dabbing, mopping motion. Sort of like lightly swabbing the deck, This, I find, helps to cut down on harsh brushstroke lines.
8. Glazing and Beyond!
After letting that piece set up overnight with its underglaze application, I like to wax the bottoms (totally optional) and then dunk them in my fave Cone 6 Clear Glaze recipe, Zakin's Clear, mixed to a consistency just a little thinner that whipping cream. (Note: With the presence of Gerstley Borate, it is good practice to sieve your glaze from time to time to avoid little clumps of GB) After the glaze dries, a little wipe of the bottom of excess glaze with render that piece good to go! To note: I know some artists like to crash cool their kilns, but to avoid crazing, exercise patience and let your kiln cool right down before peeking.
Zakin Clear-Cone 6
Silica : 18
Kona F4: 40
Wollastonite : 10
Gerstley Borate: 16
OM 4 Ball Clay: 12
Zinc: 4
Soto Clear Base-Cone 6
Frit 2124 : 31
Kona F4: 25
Silica: 18
Whiting: 12
EPK: 14
+ Bentonite: 2%
(Note: this glaze settles quite hard so the addition of Epson Salts really helped.)


